Your first pattern#
This walkthrough takes you from an empty workspace through every step of creating, designing, and editing a pattern in Cromo Cloud and CromoDesigner. We'll stop just short of actually publishing — that's a step you'll want to take with a real pattern, not a test one.
Before you start
You'll need a Starter or Creator subscription. If you don't have one yet, see Choose a subscription first.
1. Create a new pattern on Cromo Cloud#
On the Cromo Cloud site, click Add pattern in the top-right.
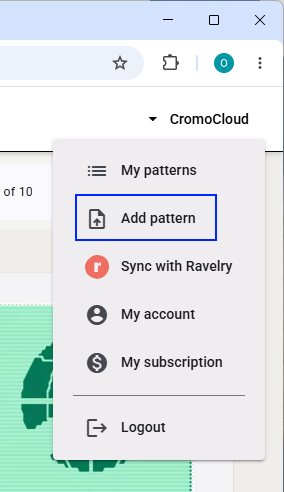
A new draft pattern is created for you, and the pattern detail page opens in edit mode. Take a moment to read the preliminary description - it gives you a preview of the steps ahead. For now, leave everything unchanged (the draft pattern isn't visible to anyone else yet) except for the pattern name in the upper-left corner: call it "a first test" or something similar. Click Exit edit mode, then Open in CromoDesigner. Click Yes to confirm that you want to start designing.
2. Set the pattern size#
When you open a new pattern for the first time, the properties menu pops up so you can set the width and height (in number of stitches). Let's go with 25x25 for our small tryout pattern - this exact size fits the steps we'll take in a minute. Note that the height always needs to be odd: the pattern starts and ends with a row in the background color. The width can be odd or even, and it doesn't include the two border stitches that are added at the start and end of each row.
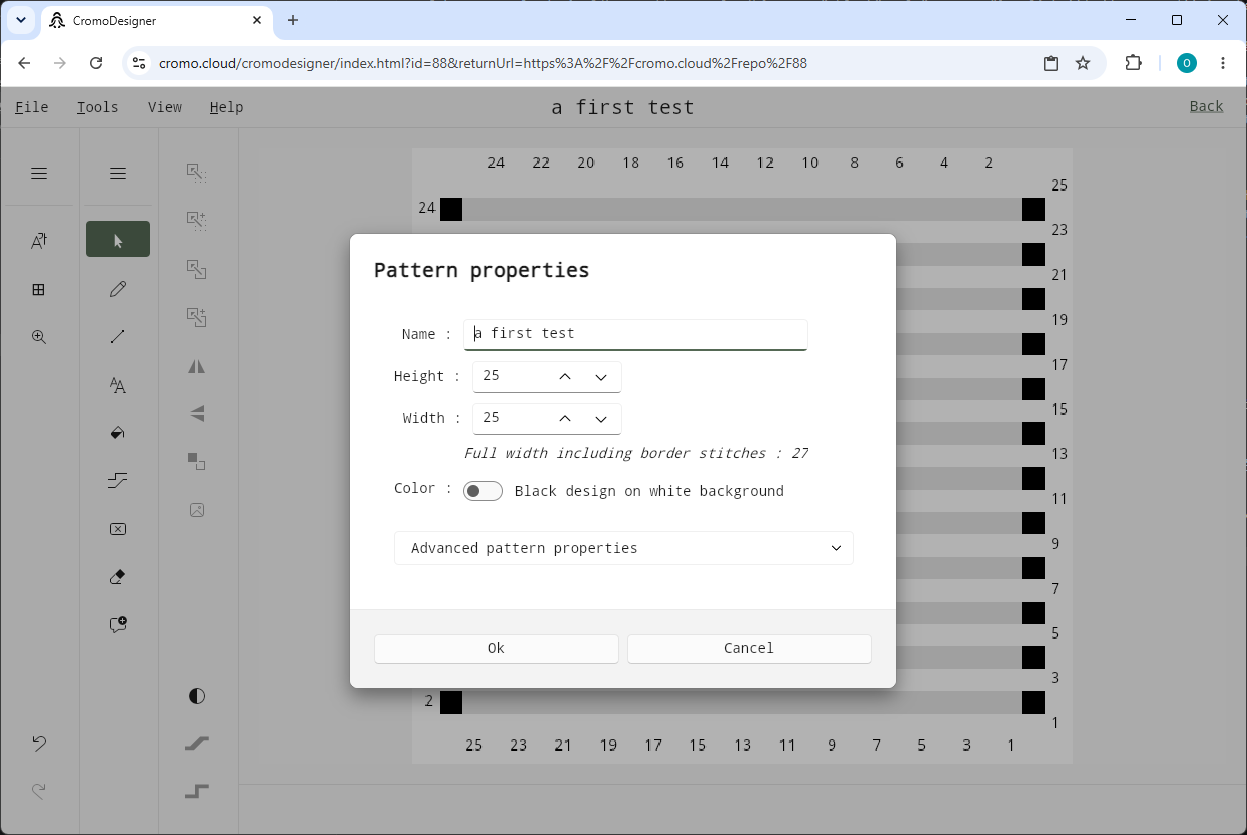
After clicking Ok to save the new dimensions, you're ready to start drawing. But first, let's showcase a feature that's especially useful for designers who already have patterns they'd like to publish on Cromo Cloud.
3. Use a background image#
You can load an existing chart picture as a reference background on the design canvas. This lets you draw over the image and convert your classic pattern into a digital Cromo Cloud pattern in no time. You can upload the image from your computer, or specify a URL if the image is online.
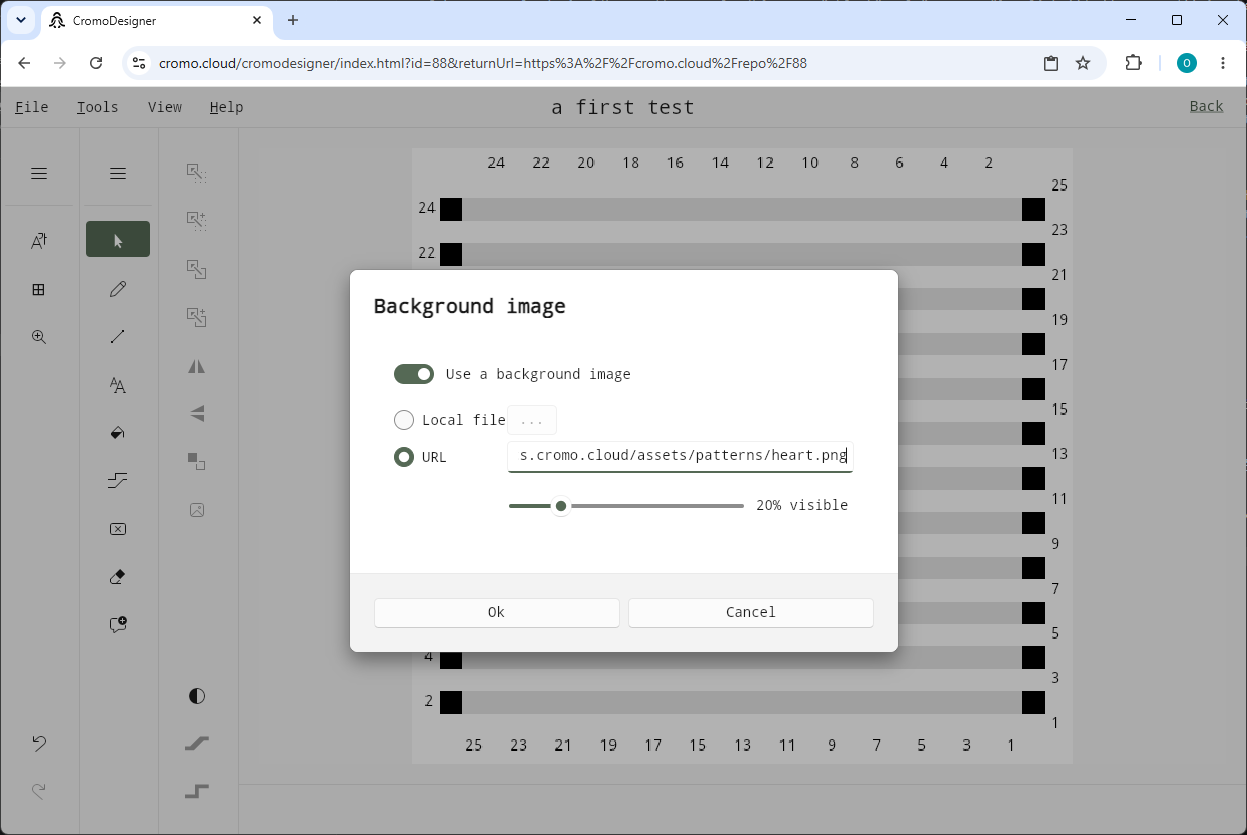
For our first 25x25 stitch pattern, we'll use a sample image available at https://docs.cromo.cloud/assets/patterns/heart.png.
Go to View → Background image, click the toggle to Use a background image, select URL, and paste the URL above:
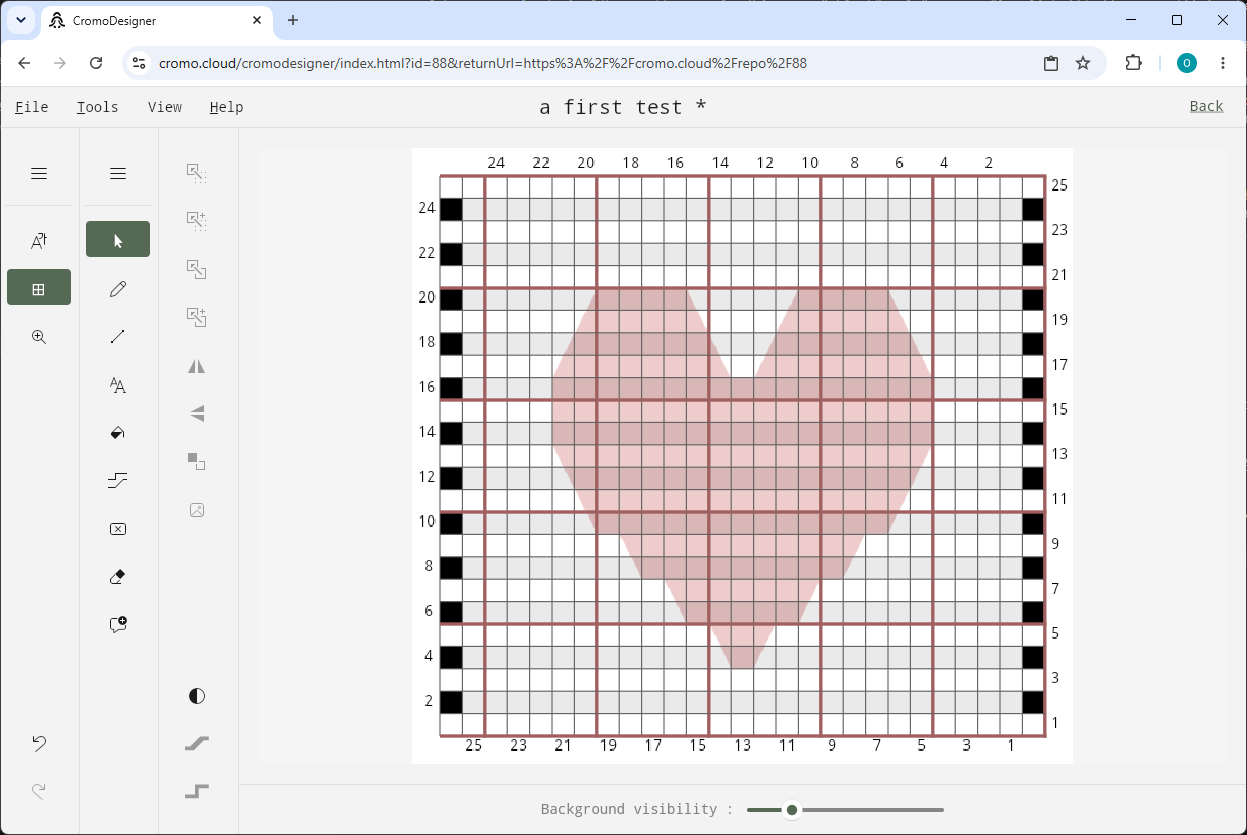
When you make the pattern grid visible by clicking the Show grid toggle in the left side menu, you'll see that the picture perfectly matches our pattern grid - we chose the same size on purpose. This makes it easy to draw an exact copy of the original. (remember: we entered a size of 25x25, which did not include the border stitches. The background picture covers the full pattern, it has a size of 27x25 stitches)
It's a good habit to save your work regularly while drawing. Use File → Save, or even easier, the standard keyboard shortcut. While we're on the topic of shortcuts, you'll also use undo and redo constantly while drawing - either through the back/forward arrows in the lower-left corner of the screen, or with the standard keys:
| Action | Shortcut |
|---|---|
| Save | Ctrl+S / Cmd+S |
| Undo | Ctrl+Z / Cmd+Z |
| Redo | Ctrl+Y / Cmd+Shift+Z |
4. Draw the chart#
Click the pencil icon to start drawing, and trace over the outline of the heart shape. Slanting is enabled by default (the toggle button at the bottom of the pen submenu), so you'll be able to follow the diagonal outline smoothly. If you prefer to stick to single and double crochet stitches in your future patterns, disable slanting by clicking that toggle. For now, just draw the left side of the heart contour - we'll demonstrate some editing options next. If you make a mistake at any point, undo Ctrl+Z is your friend.
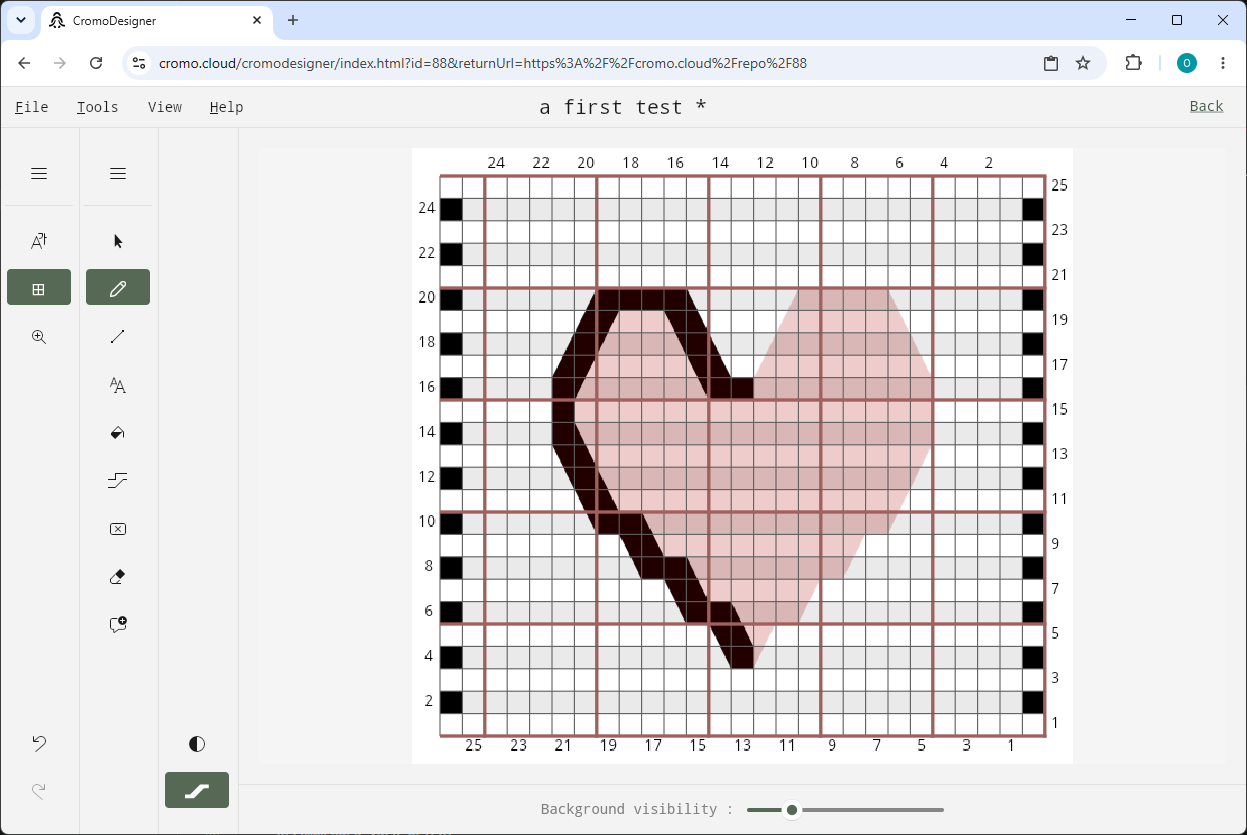
The Select option lets you make a selection on the canvas, then Move or Copy it. The Move and add and Copy and add options merge the moved selection with what's beneath it, instead of replacing it. Select the contour you just drew, copy it, and drop the copy next to the original:
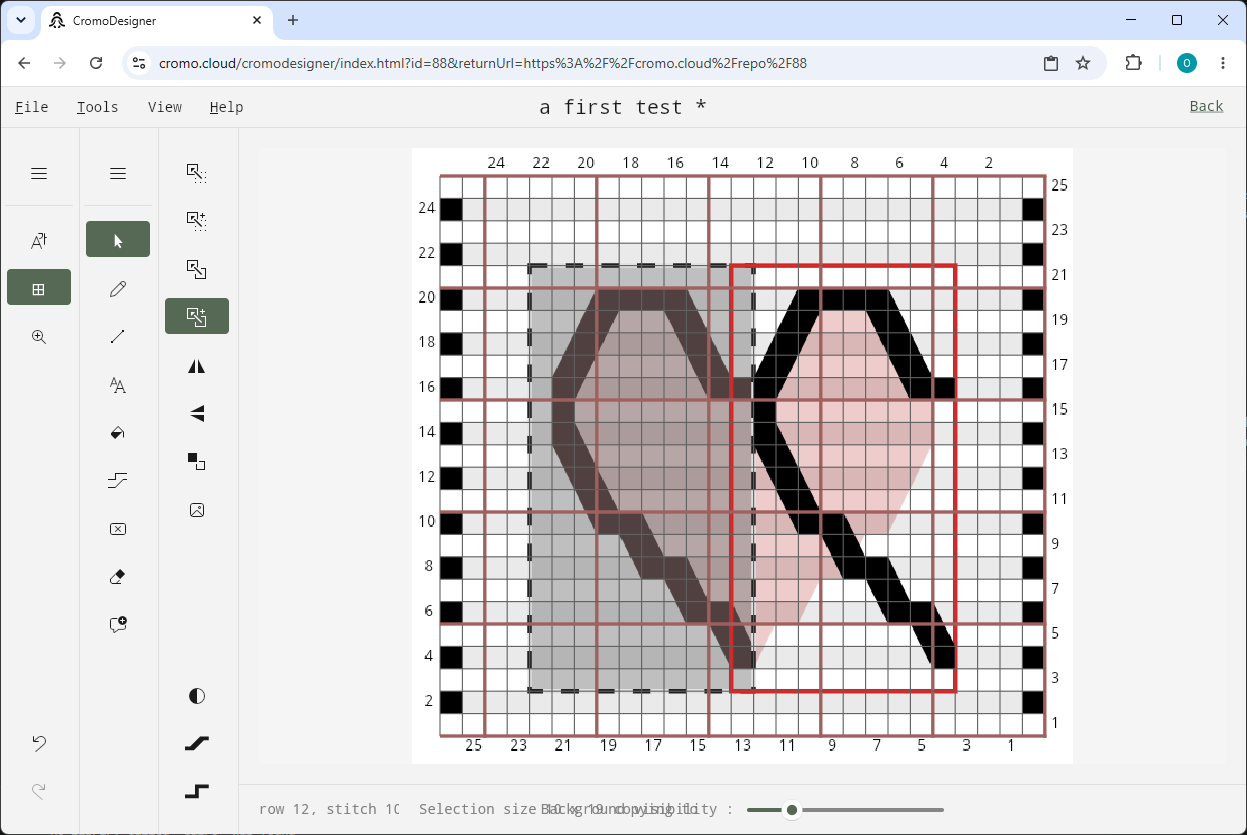
Now use the Flip horizontal option on the copied section to mirror it into the right side of the heart. Depending on the exact selection you made, some unwanted stitches may have been copied or mirrored, as in the screenshot below. No problem - the Erase button lets you clean them up.
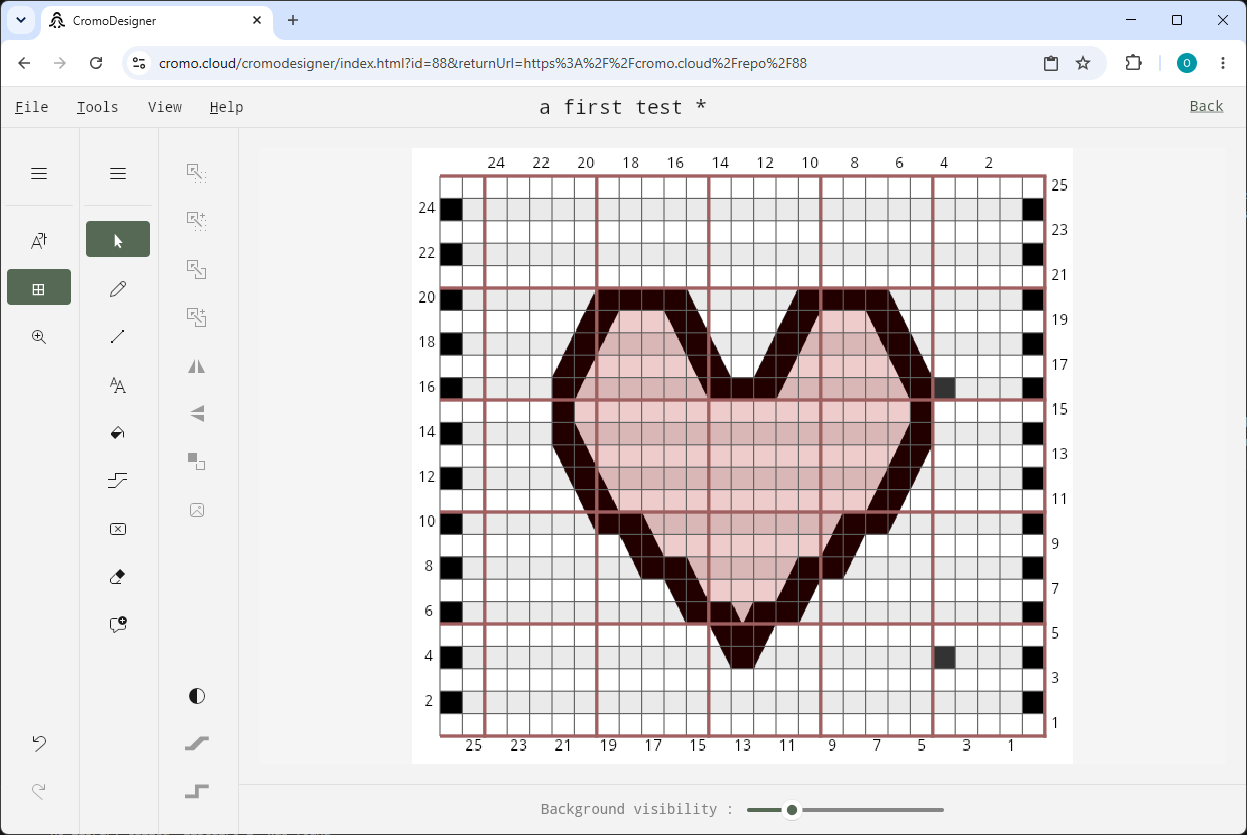
Time to hide the background picture - we don't need it anymore. The slider at the bottom lets you reduce the background visibility to zero. But once you're truly done with the background, it's better to remove it completely: go back to View → Background image and toggle Use a background image off. This isn't important for this tiny sample pattern, but you'll be working with larger patterns in the future, and the background can affect the performance of the drawing engine in your browser - drawing is smoother when no background needs to be rendered.
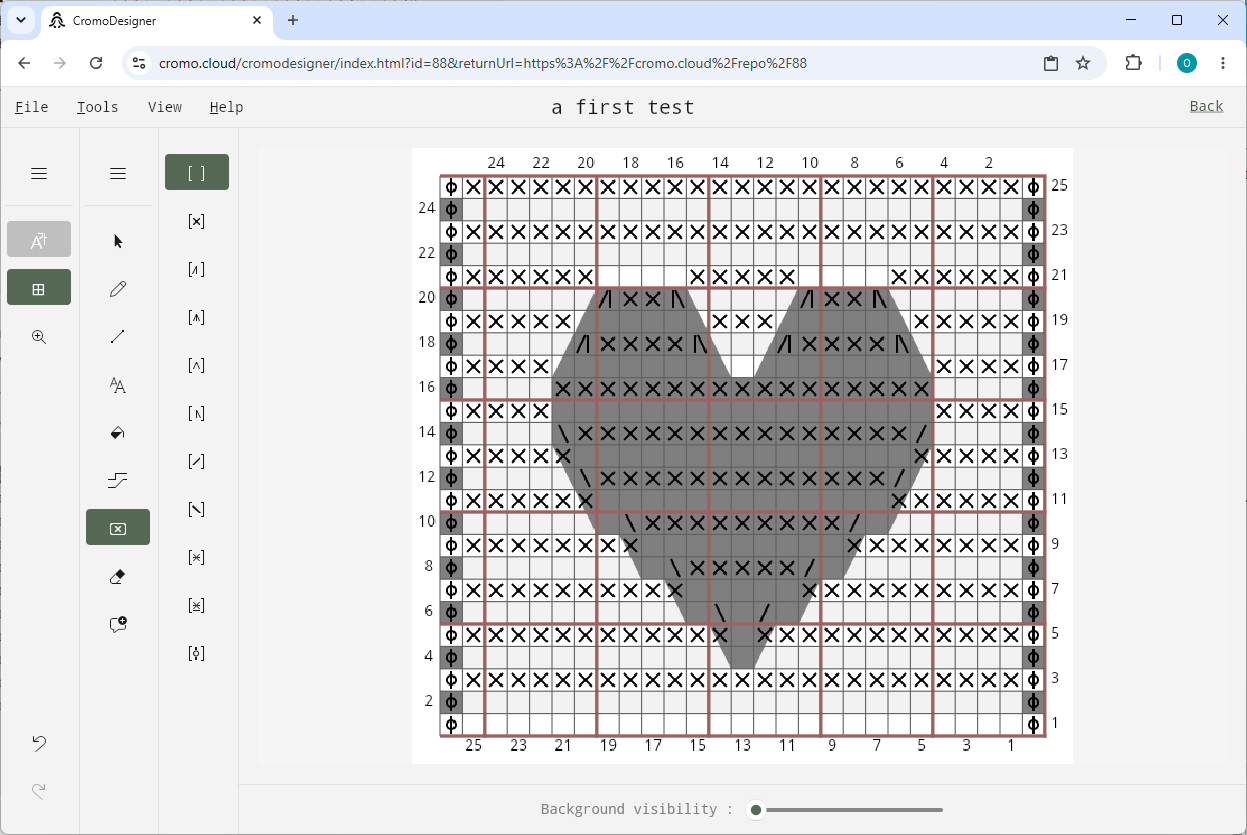
There are many more drawing options worth demonstrating (lines, curves, filled or hollow shapes, and so on), but let's finalize our small demo pattern by filling in the heart. Activate the Fill option, keep the default solid fill pattern, and click inside the heart:
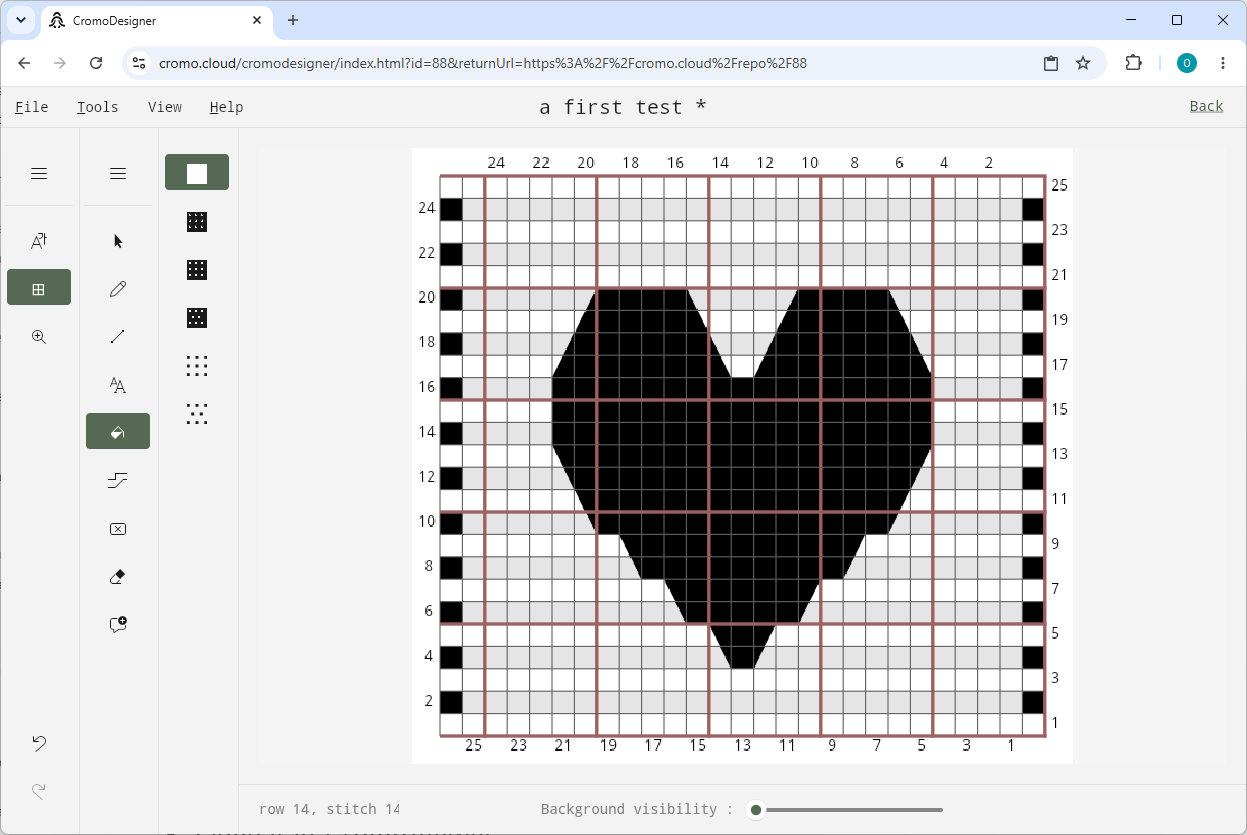
As a final check, activate the stitch symbol view by clicking Show symbols in the left side menu. If needed, you can manually correct or modify any individual stitch with the Edit stitch option - select a stitch type, then click the stitch you want to change.
5. Preview#
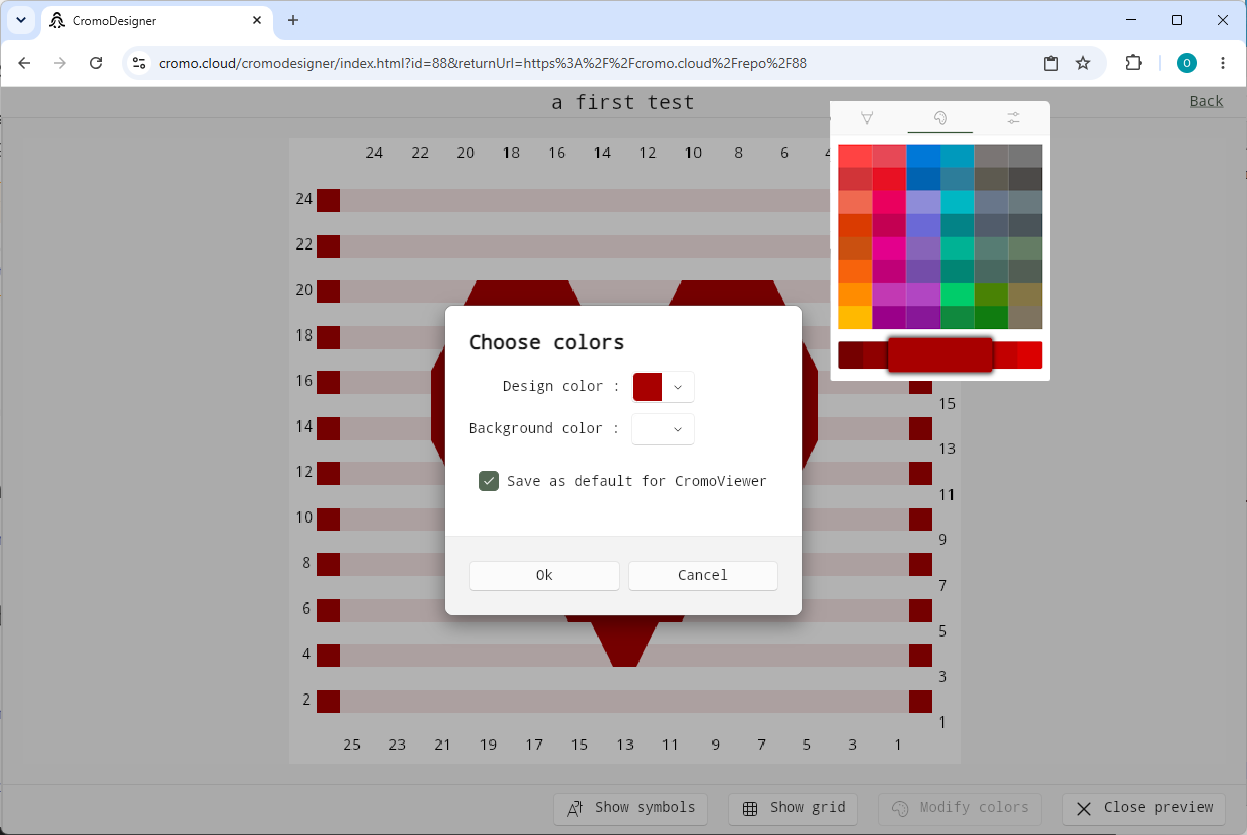
Time for the next step. Click View → Preview in the top toolbar to see your pattern as it will appear in CromoViewer. While crocheting, the unfinished part will look as you see it now, with stitch symbols and grid visible. The finished part will have the symbols and grid hidden - toggle Show symbols and Show grid to preview that.
We've been designing in a black-and-white environment, but the final result can be shown in CromoViewer in full color. You probably want our little demo heart to be red? Pick a color for the design ("color A") and for the background ("color B"). Tick Save as default to have your pattern open with these colors by default in CromoViewer - the crocheter can still pick different colors in CromoViewer if they prefer.
6. (Optional) Generate a chart and written pattern#
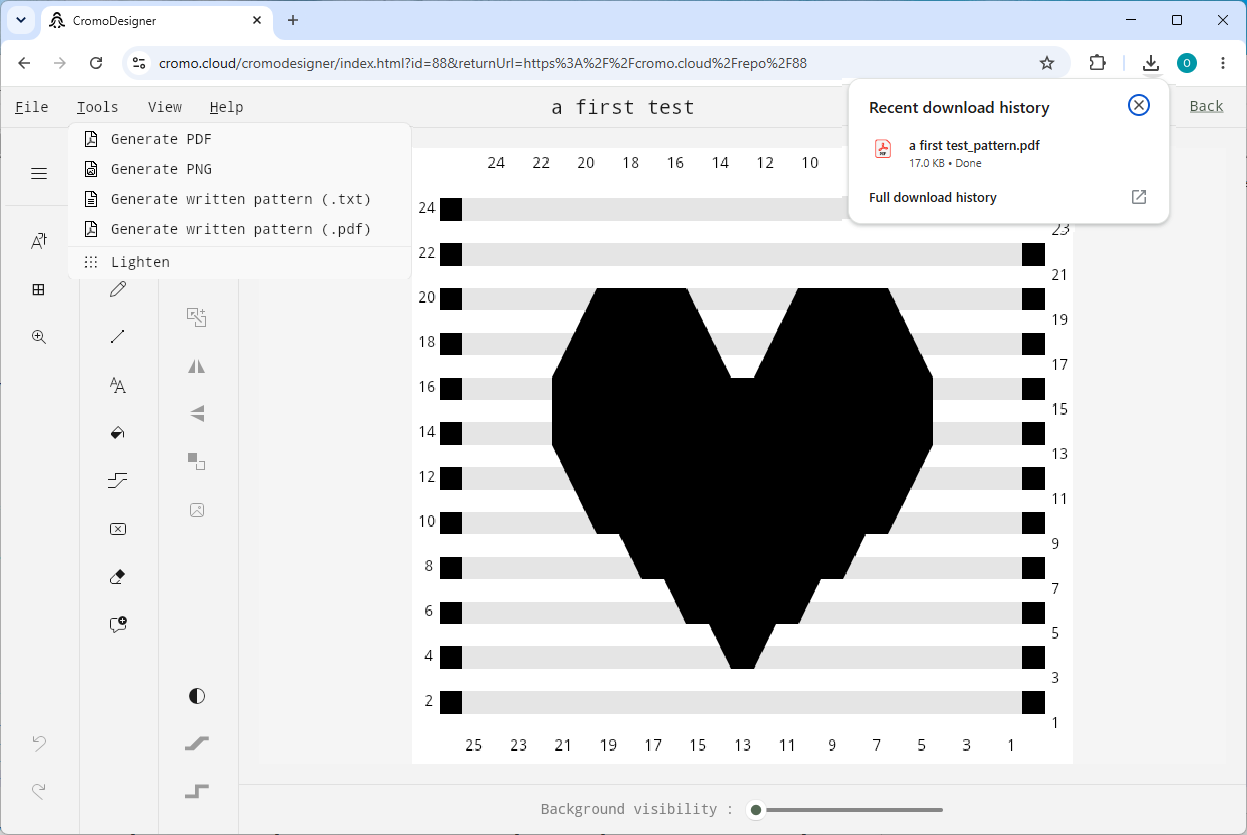
The main advantage of CromoDesigner is that anyone with access to your pattern can open it directly in CromoViewer - no chart or written pattern needed. So this step is just to mention that these options are available in the Tools menu in the top toolbar, in case you ever want to export them.
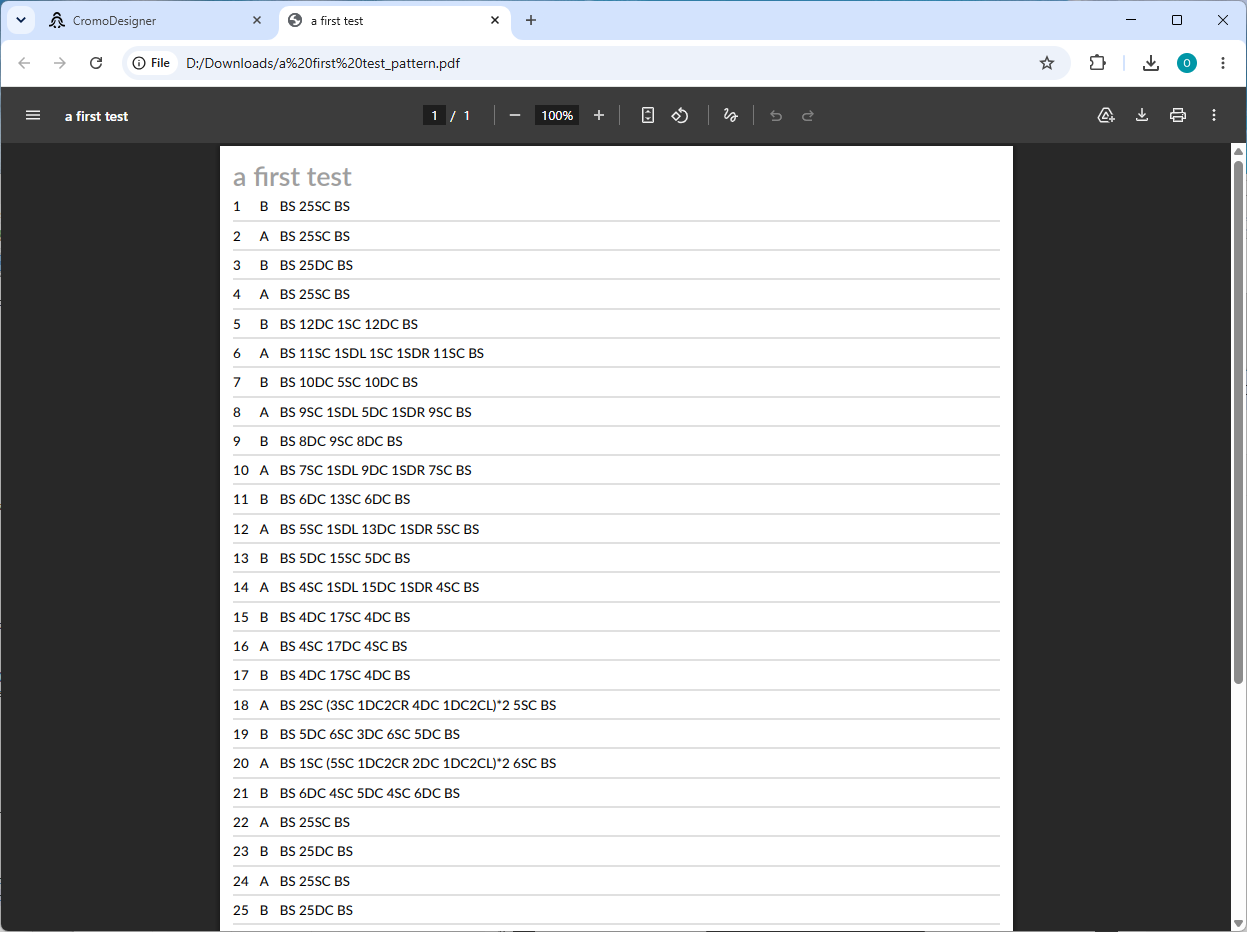
Here's what the written pattern looks like:
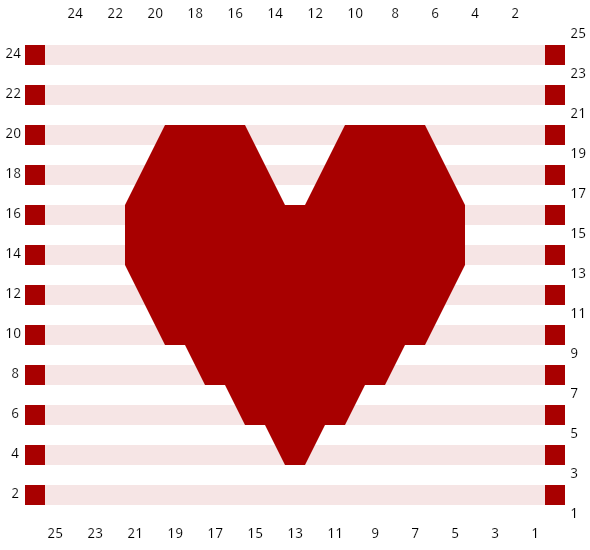
When you generate a pattern picture (Tools → Generate PNG), the current Show symbols and Show grid settings are used. Let's generate a chart picture without grid or symbols, to use as a preview picture on the Cromo Cloud website. (An actual photo of your finished work is always better, but you won't have one for this small getting-started pattern.) Here's the result:
7. Edit the repository entry#
We're done in CromoDesigner. Click Back in the upper-right corner to return to the Cromo Cloud website. The ⋯ menu lets you take the next steps.
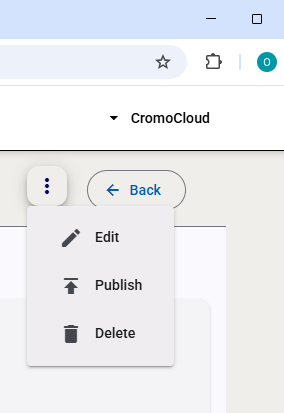
You have three options:
- Edit the pattern - this is what we'll briefly try out next.
- Publish the pattern - you probably don't want to do this with a test pattern (see the info box below).
- Delete the pattern - this is what you'll most likely want to do after finishing this walkthrough, when you're ready to start on a real pattern.
Draft vs. published
A draft is visible only to you. You won't find it in the Cromo Cloud pattern library - instead, go to My patterns via the context menu in the upper-right corner, where it appears under Patterns I have designed myself. Only after you publish the pattern will every Cromo Cloud visitor see it in the library, and only those you've granted access will be able to open it in CromoViewer.

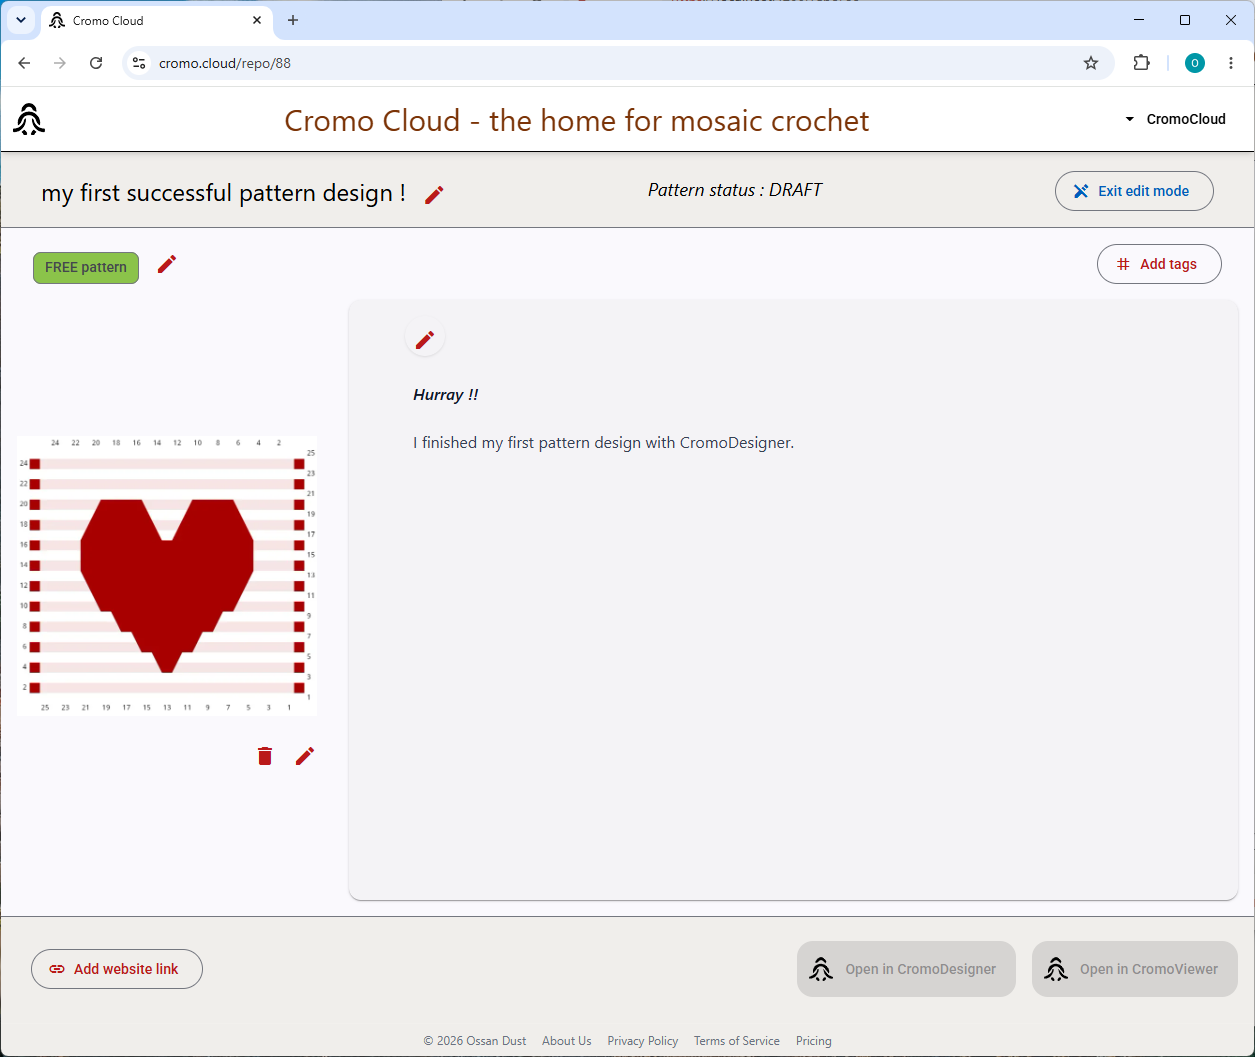
After entering edit mode, red pencil icons appear next to each section of the pattern detail page. Click the icon in the description pane to edit it, and replace the template text with something more personal. (Note the Cancel/Save buttons at the top of the text editor: as long as you don't exit the description editor, you can't click any of the other edit icons.) Get rid of the "NO IMAGE AVAILABLE" picture by replacing it with the pattern chart we saved earlier. When you're done, click Exit edit mode.
8. Open it in CromoViewer#
One final step. You probably won't be crocheting this simple heart pattern, but at least you can see how a pattern behaves in CromoViewer. Click Open in CromoViewer. Use the arrow keys (left/right or up/down) to scroll through the pattern and watch how it gradually transitions from an instruction chart into a finished pattern image. Most importantly, notice how the large text always shows how many stitches of which type are coming next.
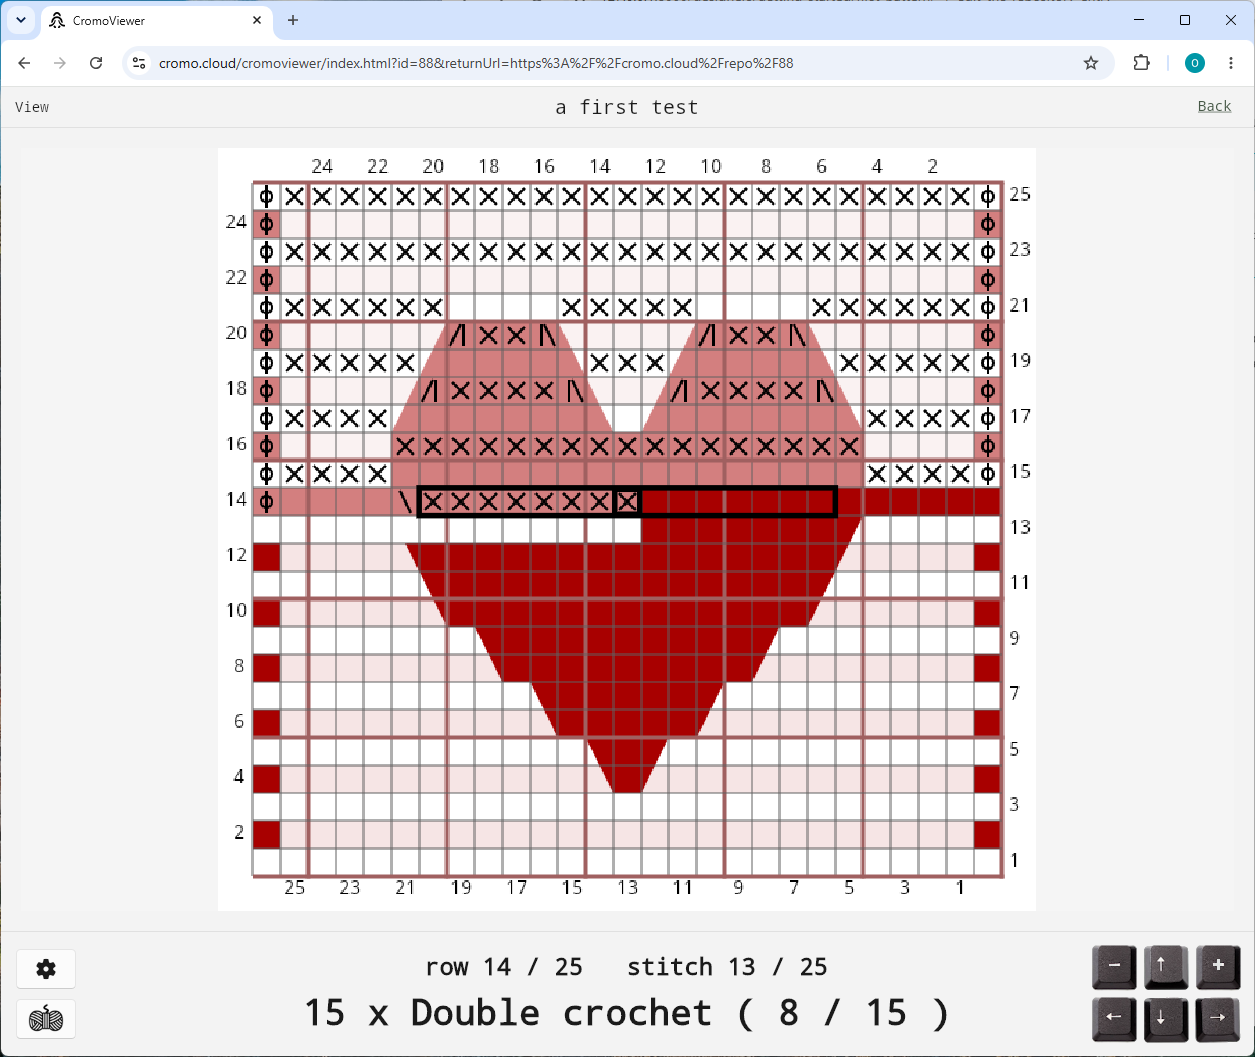
By the way: if you close CromoViewer halfway through a pattern and reopen it later - here or on another device - you can simply continue from where you left off. Your progress is automatically saved online. You can read more about CromoViewer here.
You're done#
You've now created your first pattern with CromoDesigner and seen how it looks in CromoViewer. Time to let your creativity take over!